5 : The Potentiometer
Usually it looks like this
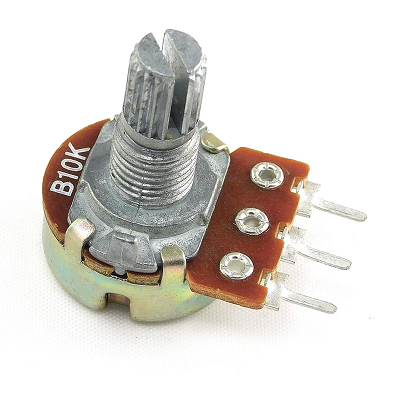
And inside it’s built like this
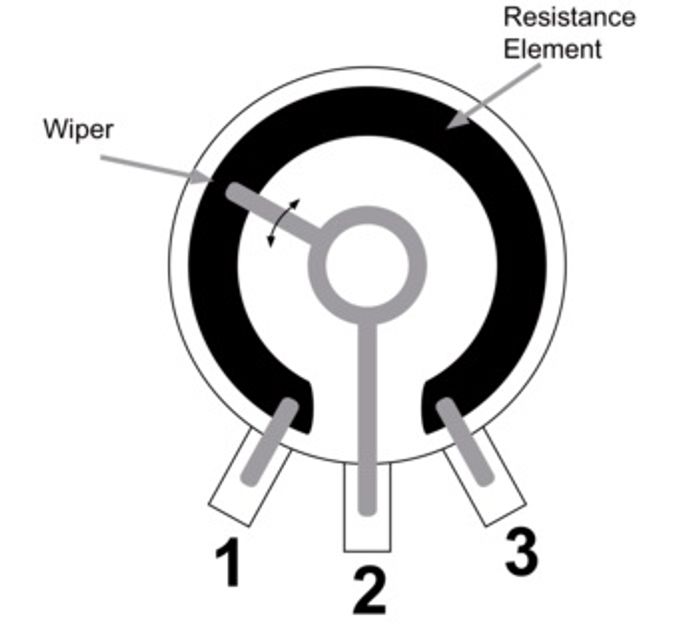
The main point of the potentiometer is to have a variable resistance. On the image above, imagine the current is entering via pin 1 what would happen if the wiper was turned all the way to the left? What would happen if we turned the wiper all the way to the right?
If we turn the wiper all the way to pin 1 then the current will arrive and go straight to pin 2 without going through the resistive piece so pin 2 will have the same voltage as pin 1.
If we turn the wiper all the way to pin 3 then the current will have to travel through the whole resistive element and the voltage will be significative lower on pin 2 than on pin 1.
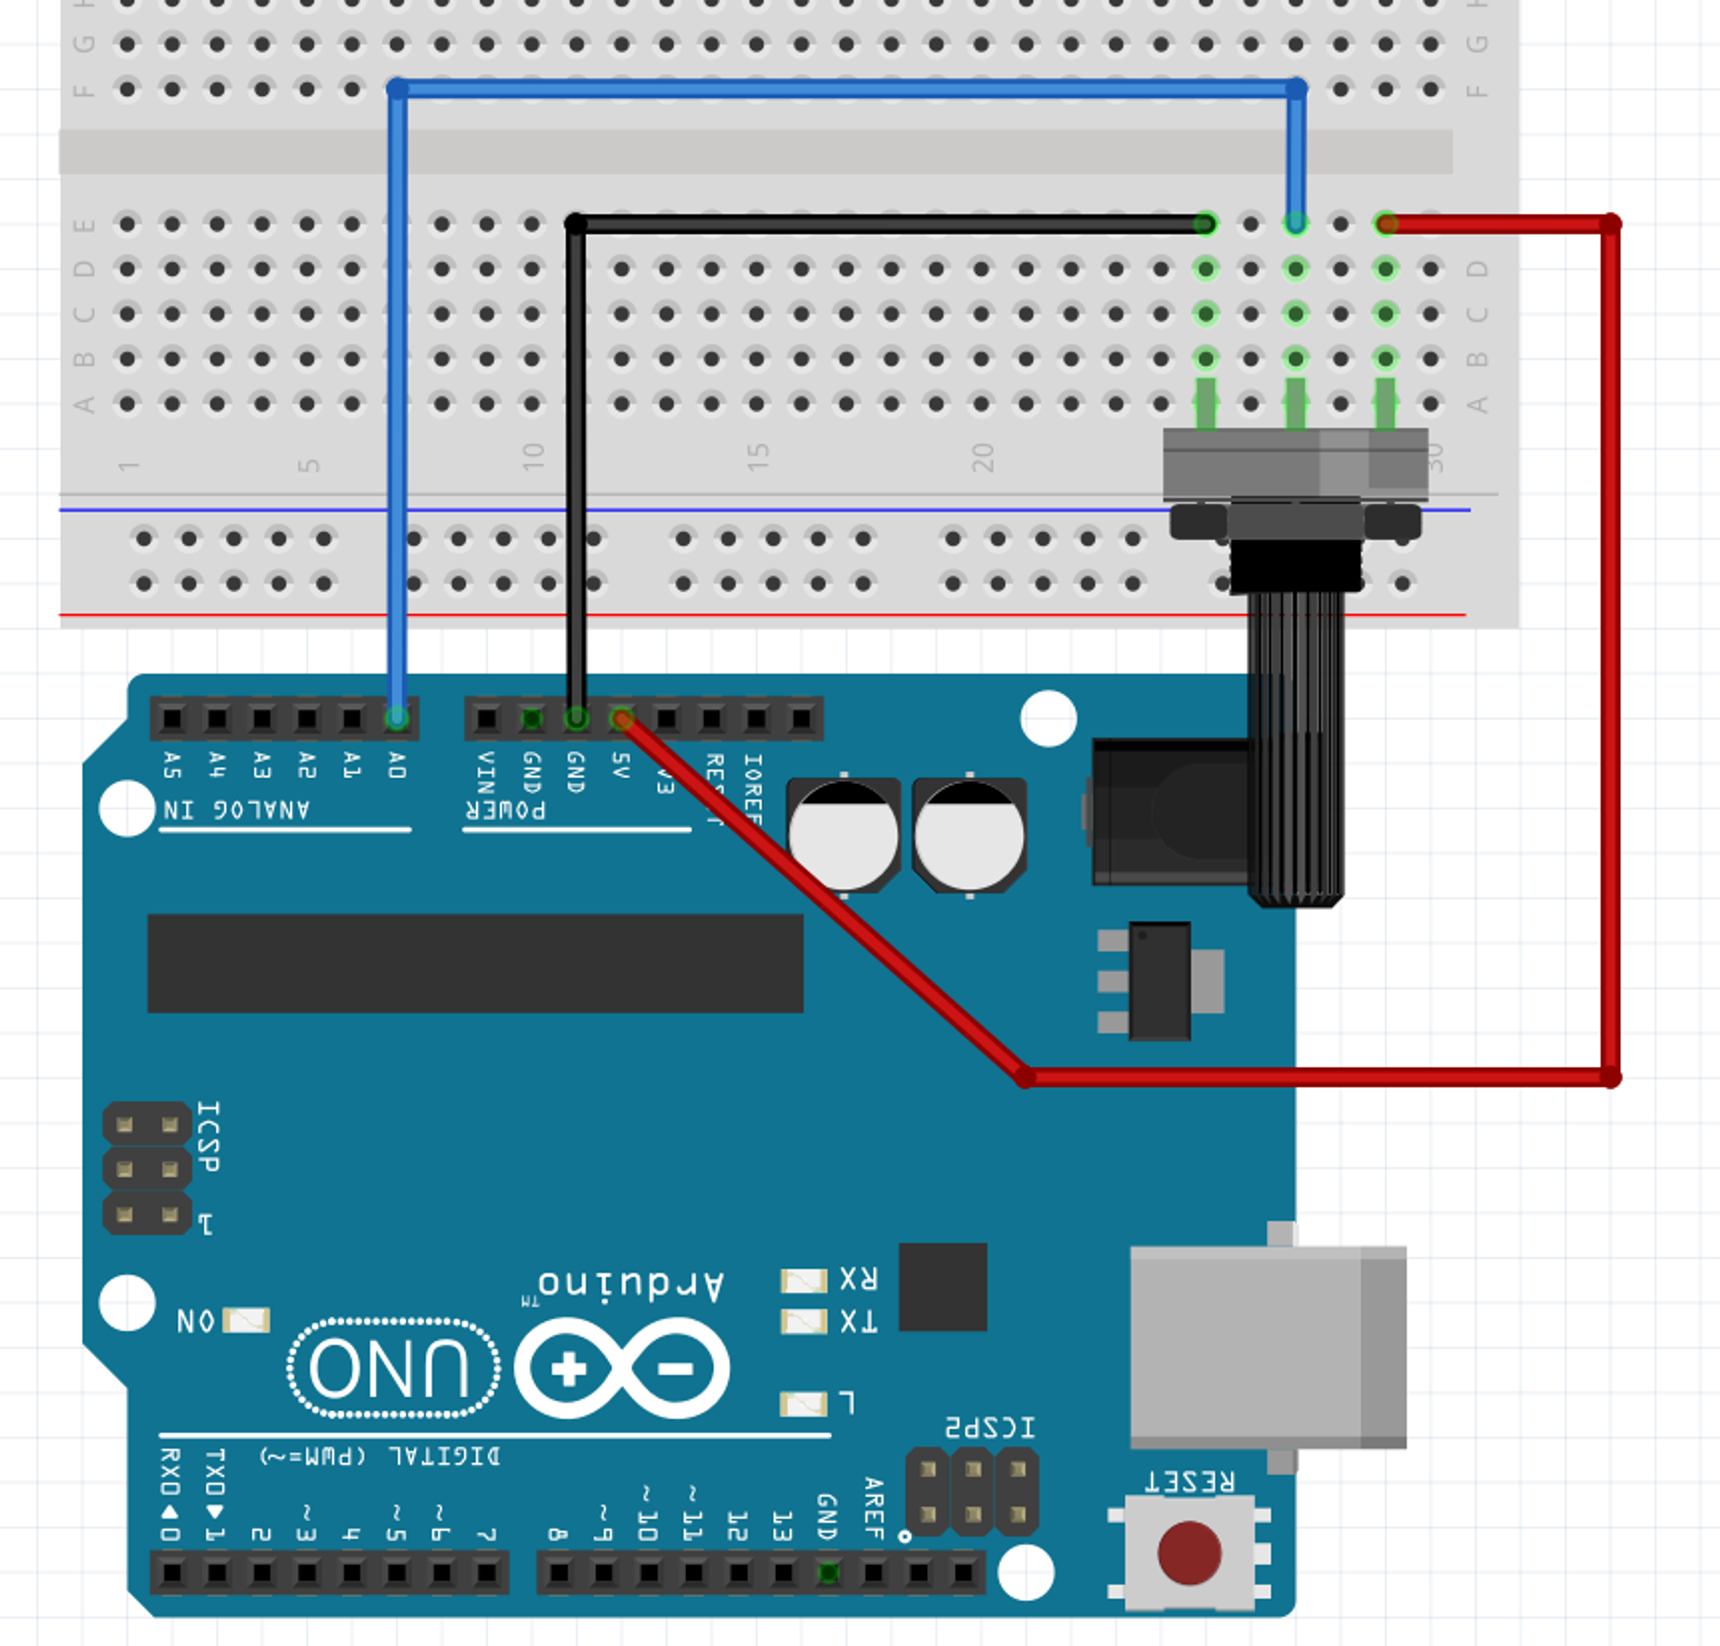
There are pins on the arduino to measure the voltage, these are the analog inputs shown below
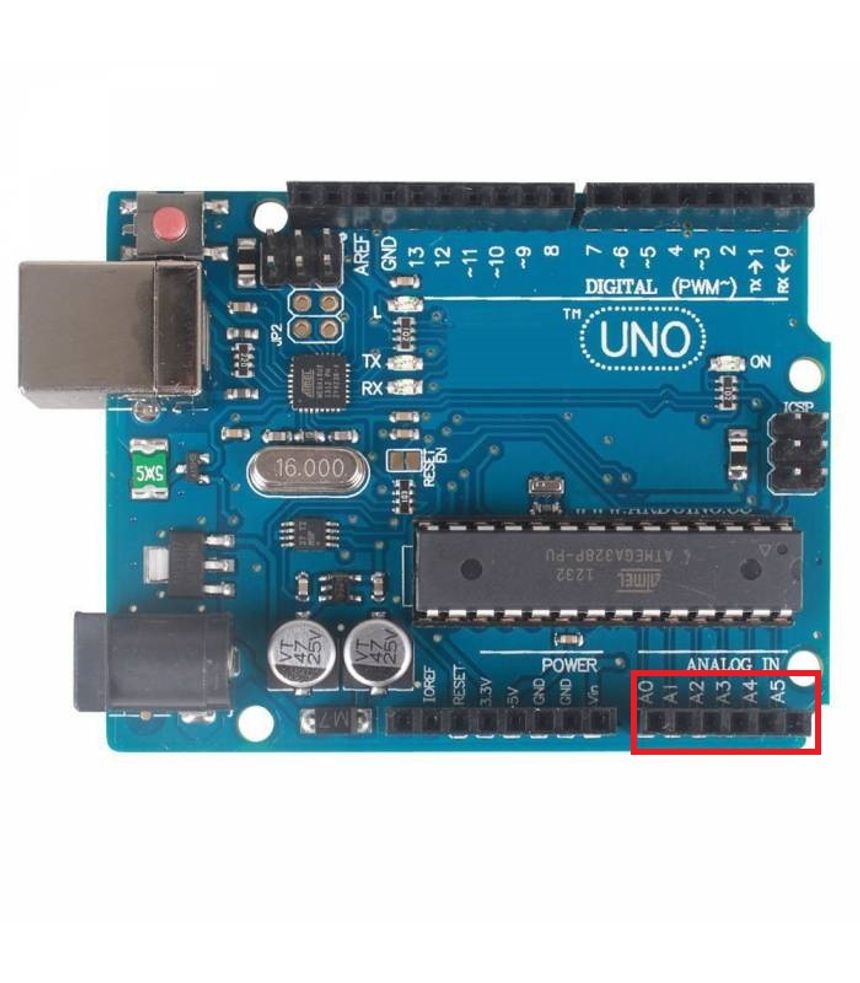
They serve to read analog signals (currents that are somewhere between 0 and the current of the circuit).
If digitalRead() is the function that lets us read digital signals on the digital pins you wouldn’t surprised to learn that analogRead() works exactly the same.
Try the code and circuit below to see how the potentiometer works.
// put your setup code here, to run once at the start
void setup() {
    //starts a connection between the Arduino and the computer
    Serial.begin(9600);
}

// put your main code here, to run over and over and over and...
void loop() {
    Serial.println( analogRead(0) );
}
You’ll see that the values match how much you turn the potentiometer, going from 0 to 1023.
So far, we’ve done everything without a core concept of programming, because we could. But we’ll need to take a bit of time to see it now. I’m talking about variables.
A variable lets you define a name which reference a place in memory. To do so you need to write it like so
int myVar = 0;
this will put the value 0 inside a memory space called “myVar”. Ok you can guess all of this is done by writing myVar = 0 . Notice we’re using only one = and not two. Two is for comparing, one is for saying “this variable is now equals to this”.
But what is int doing?
In some languages you can put whatever you want inside this memory space, however this is not the case here. The word int specify that the space can only contain integers, like 3, 420, or 13 but not 9.3.
Here are the types you should know :
int: for the whole numbers, also called integersfloat: for numbers with a floating point like 9.3, 6.6 or even 44.0short,byte,u_int8t: are all the same and only store integers from 0 to 255. You’ll see them often in library code because they use less memory. But honestly you can put int everywhere. You won’t need to stress about using these.bool: this contains only0or1which also corresponds to the keywordsfalse(0) andtrue(1). They are very handy to keep track of what should be on or off. I could save the state of an LED this waybool myLEDState = truethis won’t turn off my LED, I would still need to writedigitalWrite(7, myLEDState). This type might feel too abstract for now, don’t worry you won’t need it right away. (and as I’m writing this I’m struggling to find a convenient and short example)
Ok, we still need to see one last thing. We know how to put a concrete value inside a variable with int myVar = 5 but what would be more interesting would be to save the result of a function so we can re-use it multiple times. Right now if I wanted to see the value of my potentiometer hooked on pin 0, I would need to write the following line
Serial.println( analogRead(0) );
That works because the analogRead() function gives back an integer between 0 and 1023 so once the arduino does analogRead(), the value given back replaces the analogRead(0).
Instead of using it right away we could do the function then save it in a variable like so
int myPotentiometerValue = analogRead(0);

Serial.println( myPotentiometerValue );
Ok that’s one more extra line to do just the same thing but now the value of my potentiometer is saved. This way we could use it multiple times like so
int myPotentiometerValue = analogRead(0);

if(myPotentiometerValue > 512){
    Serial.print("damn, it's more than average, in fact it is : ");
    Serial.println( myPotentiometerValue );
}
Also one thing you might be tempted to underestimate is that now our value is tied to a name, myPotentiometerValue is way more clearer than analogRead(0) , to tell you how great that is, I do not hesitate to create variables even if I don’t use them more than once because it makes the code easier to read.
improving myPotentiometerValue
To be complete, myPotentiometerValue is clearer but for real I would probably use potValue which takes less space on the screen and yet still enough to fully convey what it is.
We are almost done! They are called variables because they can vary. To change the value inside of the variable you just need to use the single equal symbol = again but you don’t need to provide the type because the computer already knows the type of the variable.
int someUselessVar = 5;
//now the value of someUselessVar is 5
someUselessVar = 3;
//now the value of someUselessVar is 3,
//a variable contains one value and only one value
Also, you can create a variable without putting anything inside yet like so
int someUselessVar;
Exercise 8
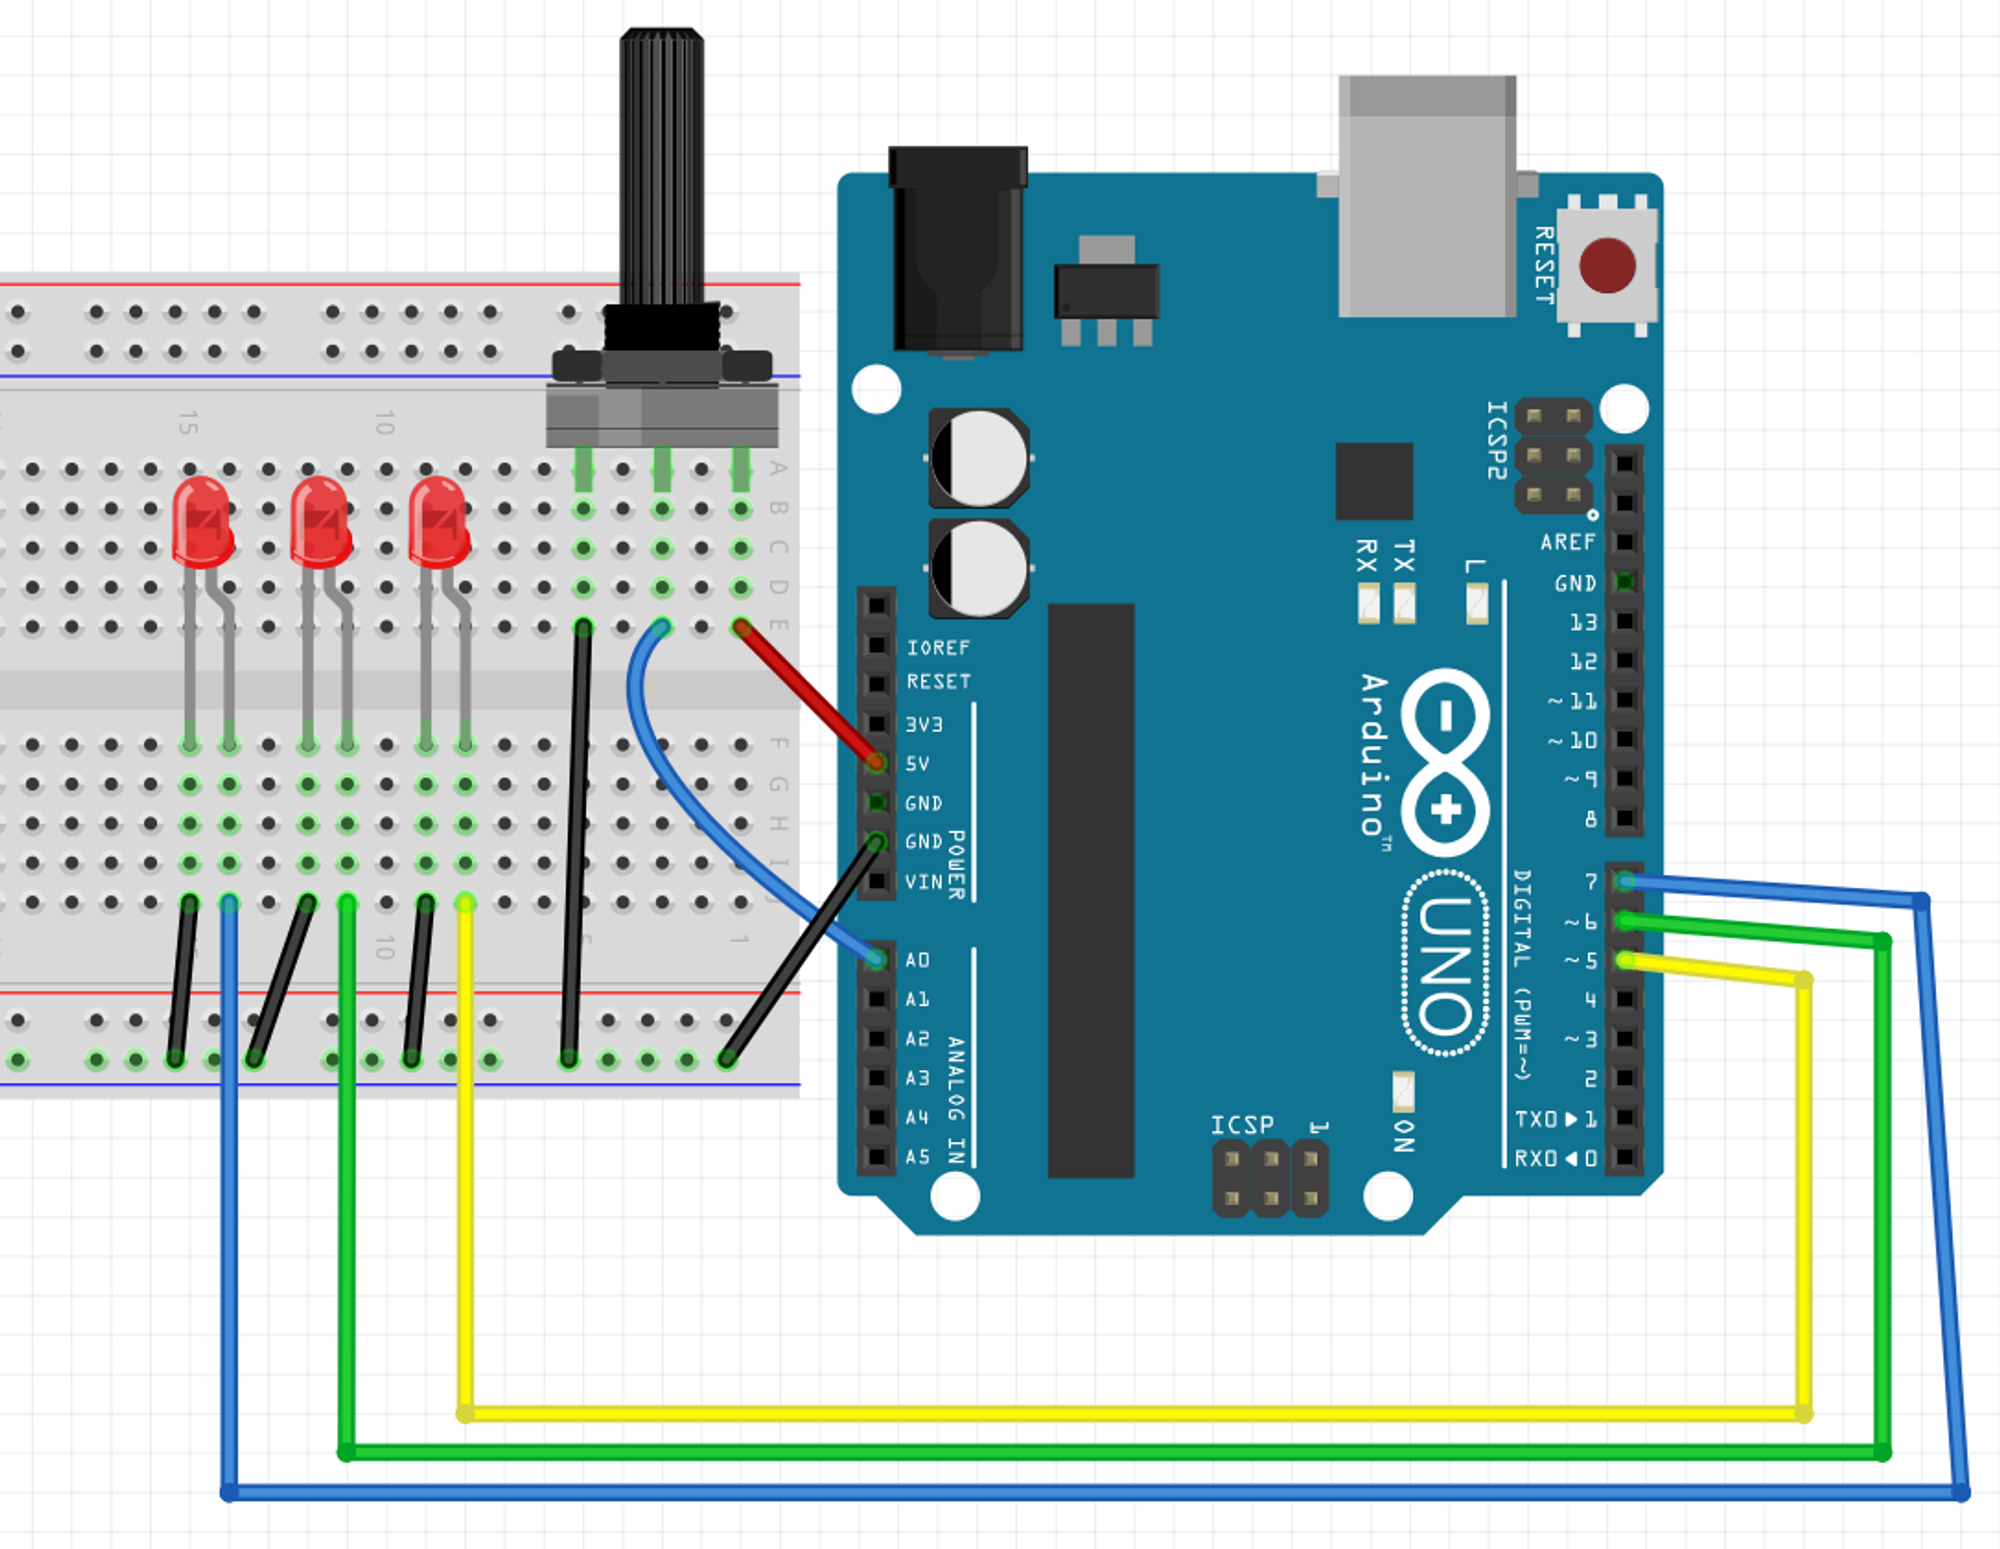
Given a circuit with one potentiometer and 3 LEDs. Make the circuit and writ the code so that
- one LED turns on if the potentiometer is turned but less than a third of the way through.
- two LEDs turns on if the potentiometer is turned somewhere between a third and two thirds of the way through.
- three LEDs turns on if the potentiometer is turned on more than 2 thirds of the way through.
I know it might seem a lot but I really think you can do it.
The answer will be provided in two part so you can solve it one part at a time.
Circuit answer
Code content
void setup() {
    //starts a connection between the Arduino and the computer
    Serial.begin(9600);

    //as usual, we setup the digital pins for either outputing or reading inputs
    pinMode(5, OUTPUT);
    pinMode(6, OUTPUT);
    pinMode(7, OUTPUT);
    //remark, we aren't setting the analog pin, because it is input only
}

void loop() {
    //we read the value on the analog pin tied to the potentiometer
    //and we store in a variable so we can compare it later
    int potValue = analogRead(0);

    //if the value of my potentiometer is strictly greater than 0
    if(  potValue > 0 ){
        digitalWrite(5, HIGH);//light up the LED
    }else{
        digitalWrite(5, LOW);//other wise, keep it off
    }

    //if the value of my potetiometer is greater than a third of 1023
    if(  potValue > 1023 / 3 ){
        digitalWrite(6, HIGH);//turn on
    }else{
        digitalWrite(6, LOW);//otherwise, turn off
    }

    //if the value of my potetiometer is greater than two thirds of 1023
    if(  potValue > 2 * 1023 / 3 ){
        digitalWrite(7, HIGH);
    }else{
        digitalWrite(7, LOW);
    }
}